Managing Scheduled Tasks
Scheduled tasks perform their work periodically and are generally used to perform system maintenance, like expiring cache entries or updating a search index. Scheduled Tasks implementations can by provided by Nucleus core, or by installed extensions.
Some of the core Scheduled Tasks have schedules created automatically by the installation wizard. For tasks which are part of an extension, you will need to create a schedule.
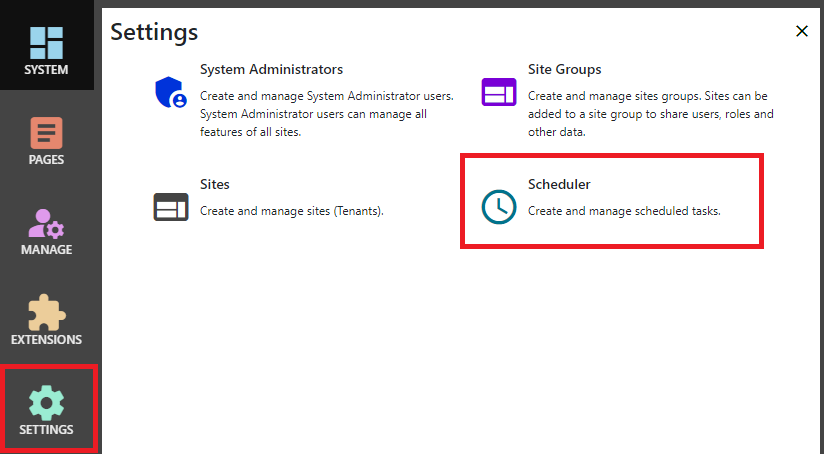
After logging in as a system administrator or site administrator, you can access the scheduler by clicking the Settings button to display the Settings
control panel, then click Scheduler.

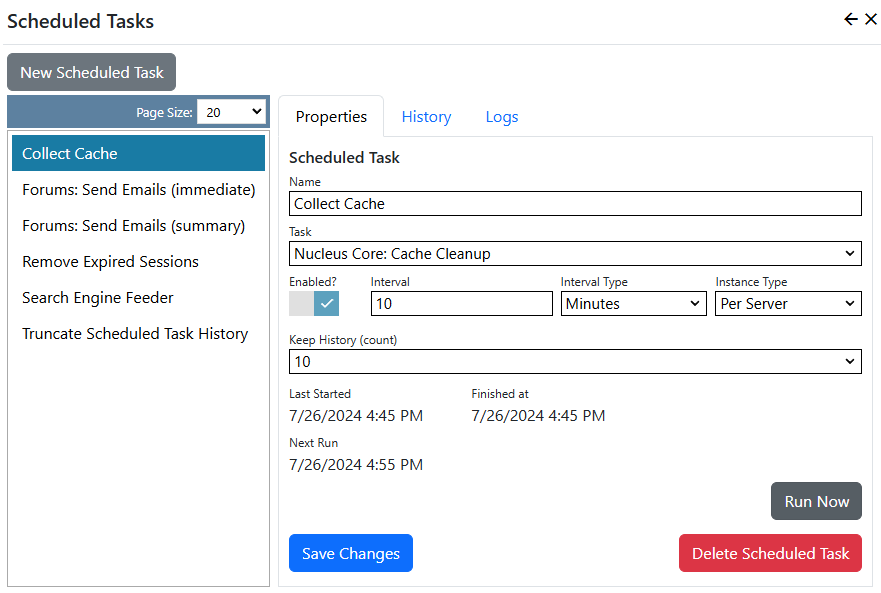
To create a new schedule, click New Scheduled Task. To modify an existing schedule, click its name in the list on the left.

Properties
| Name | The name of your schedule is displayed in administration pages, and is also the sub-directory name for scheduled task logs. |
| Task | A drop-down list of the available scheduled task types. |
| Enabled | Specifies whether the schedule is enabled. You can use this setting to temporarily disable a schedule. |
| Interval | The interval and interval type specify how often the schedule runs. You can set an interval in minutes, hours, days, weeks, months or years. |
| Instance Type | In a load-balanced environment, this setting specifies whether the task runs on all web servers, or whether it only needs to run per-instance. The approriate selection depends on what the scheduled task does. |
| Keep History | Specifies the number of history records that are retained for the schedule. |
History
Use the history tab to view past scheduled task runs and their completion status.
Logs
If you the Nucleus Text File logger is enabled (the default configuration), you can use the logs tab to view log entries for the scheduled task. Scheduled task logs are kept for 7 days.
You can use the
Run Nowbutton to run the task immediately.
The Nucleus Task Scheduler checks for scheduled tasks to run every 60 seconds.
